|
Partner Account
- How to Create a Partner Account
If you are an Employer, JOBehaviors can help you find potential candidates who meet
your company’s unique performance needs. To start having direct access to candidates
who have taken JOBehaviors assessments and given their permission to be contacted
for the training and/or employment you offer, you must first register for a free
Partner account, and then configure your account to get the information that you
specifically need.
- Fill-up the User Information and Partner Information forms.
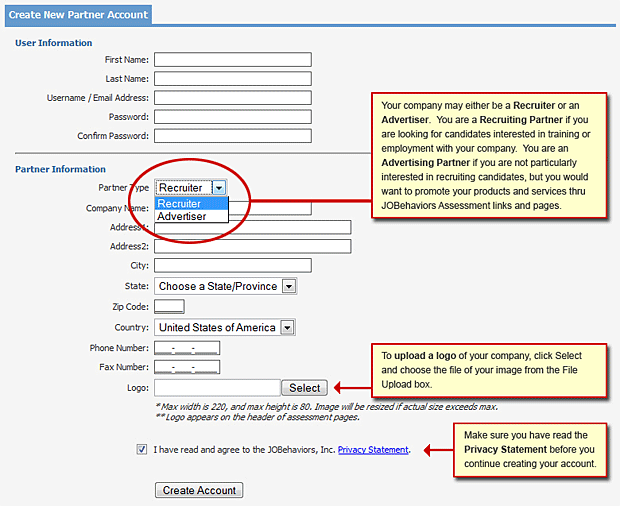
- Click Continue when you see the confirmation that your Partner account has been
created.

- Add an Assessment to your account. See How to Add
an Assessment.
- Add more Users (Optional). See How to Add a User.
- If you are a Recruiter, you will need to add Credits. See
How to Add Credits.
- Manage the results that will be saved in your account. See
How to Manage Assessment Results if you are a Recruiter or
How to Manage Assessment Results if you are an
Advertiser.
- How to Add an Assessment
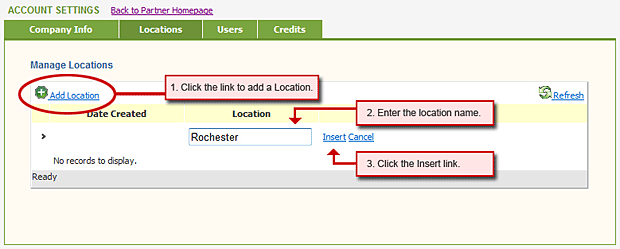
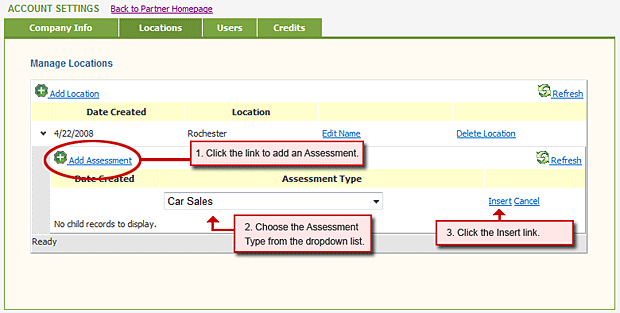
- In the Account Settings, click the Locations tab.
- Assessments are organized under Locations. Thus, to create an Assessment, you must
first create a Location.
- Under each location that you create, you can add one or more Assessment Types.
- How to Add a User
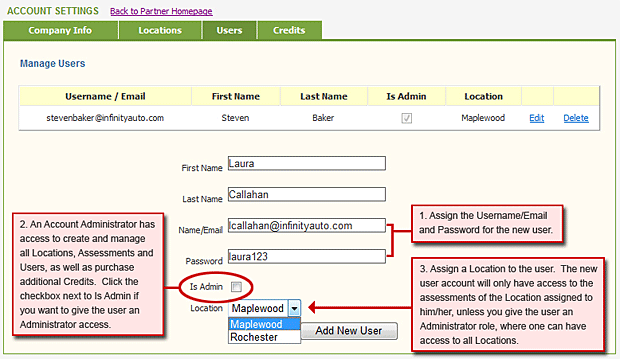
If you are an administrator of your Partner account, you may want to give other
users access to the same account.
- In the Account Settings, click the Users tab.
- Fill-up the User Information form.
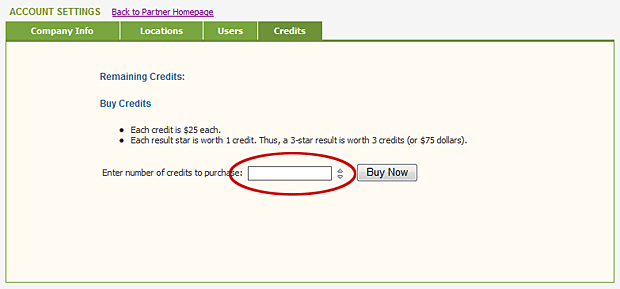
- How to Add Credits
- In the Account Settings, click the Credits tab.
- Enter the number of credits that you want to purchase. Each credit is USD 25. Each
result star is worth 1 credit. Thus, if you want to purchase an assessment result
with 4 stars, you will use 4 credits (or USD 100).
- To pay for the credits, you may choose to pay using your PayPal account or your
credit card.
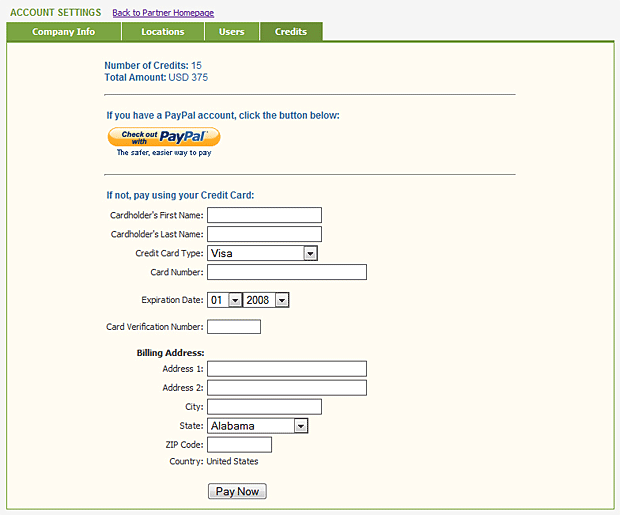
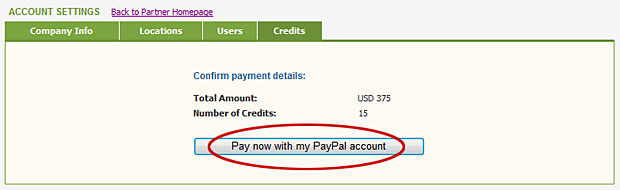
- Click the PayPal button if you have a PayPal account. You will be redirected to
PayPal’s Login page. After logging in, confirm your payment by clicking the button
on the page.
- If you opt to use your credit card, fill-up the Credit Card Information form and
click Pay Now.
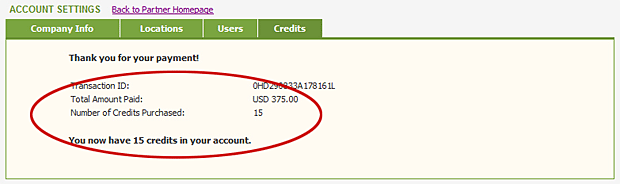
- Upon payment, the credits you purchased will automatically be added to your account.
- How to Manage Assessment
Results if you are a Recruiter
A list of all Locations and corresponding Assessments is displayed on the right
side of all Partner pages. Simply click on one of the Assessments from this list
to view and manage each of the configurations:
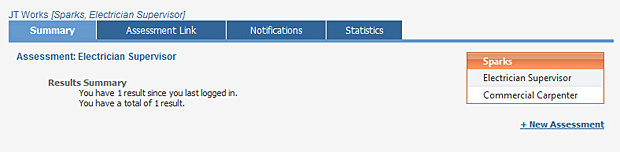
- Summary: Overview of the current Assessment selected.
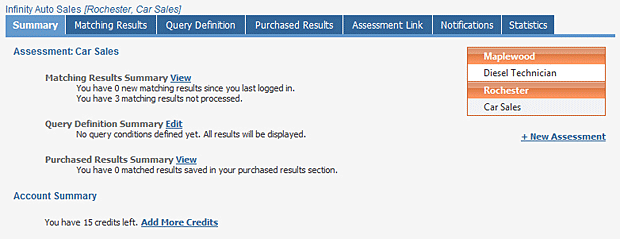
- Matching Results: List of all results taken by candidates that
they have opted to make public and that match the custom search queries you have
created.
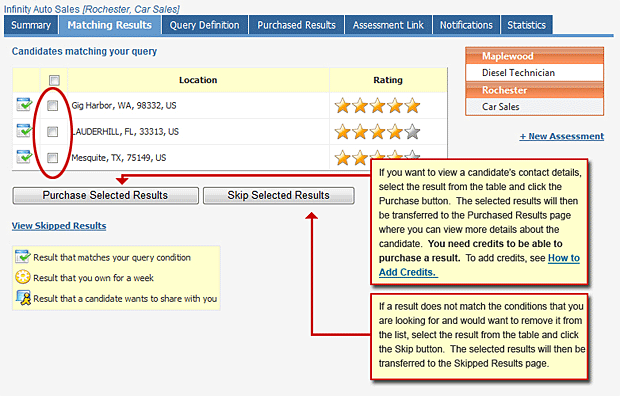
Each of the results in this list can either be one of the following:
• Result that matches your query condition: This is a finished assessment that fits
the query conditions you have set in the Query Definitions page.
• Result that you own for a week: This is a finished assessment taken thru your
partner link in the Assessment Link page. Within this period, the result is only
visible to your Partner account. After that, it may be also be viewed by other partners
where the result matches their search queries.
• Result that a candidate wants to share with you: This is a finished assessment
where a candidate has particularly chosen your company to be notified.
- Query Definition: Add/Delete conditions from this page to filter
the matching results saved in your account.

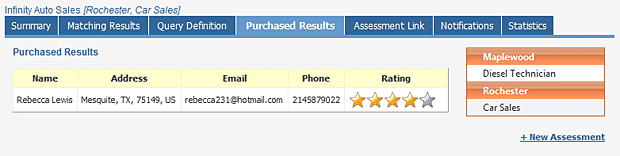
- Purchased Results: List of all purchased results with corresponding
contact details of the candidate.
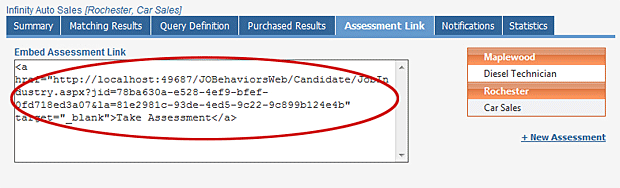
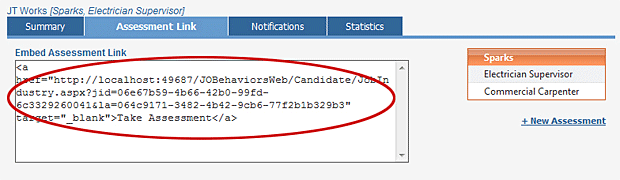
- Assessment Link: Copy and paste the embedded code that includes
your unique assessment link.
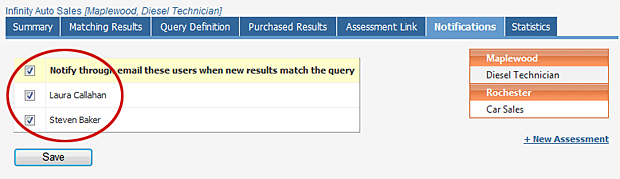
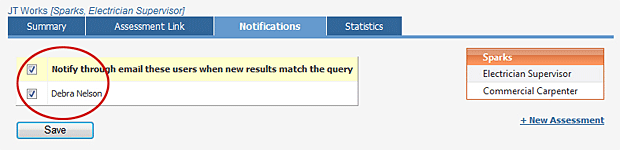
- Notifications: Select the users that will receive an email notification
with the summary count of matching assessments for the day.
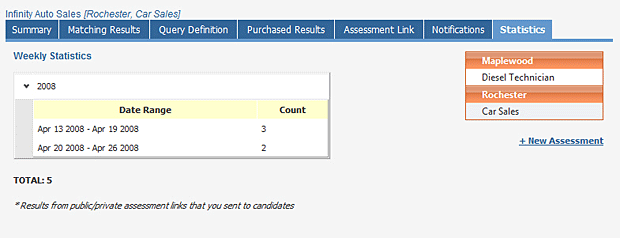
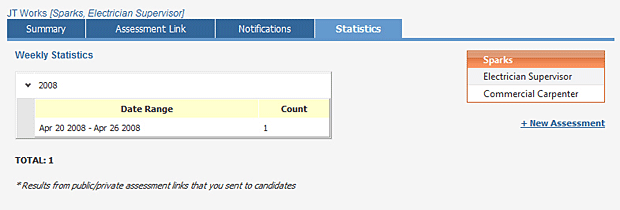
- Statistics: This page shows a weekly statistics of the number of
assessments taken thru your assessment link.
- How to Manage Assessment
Results if you are an Advertiser
- Summary: This page shows you an overview of the current Assessment
selected.
- Assessment Link: Copy and paste the embedded code that includes
your unique assessment link.
- Notifications: Select the users that will receive an email notification
with the summary count of matching assessments for the day.
- Statistics: This page shows a weekly statistics of the number of
assessments taken thru your assessment link.
|